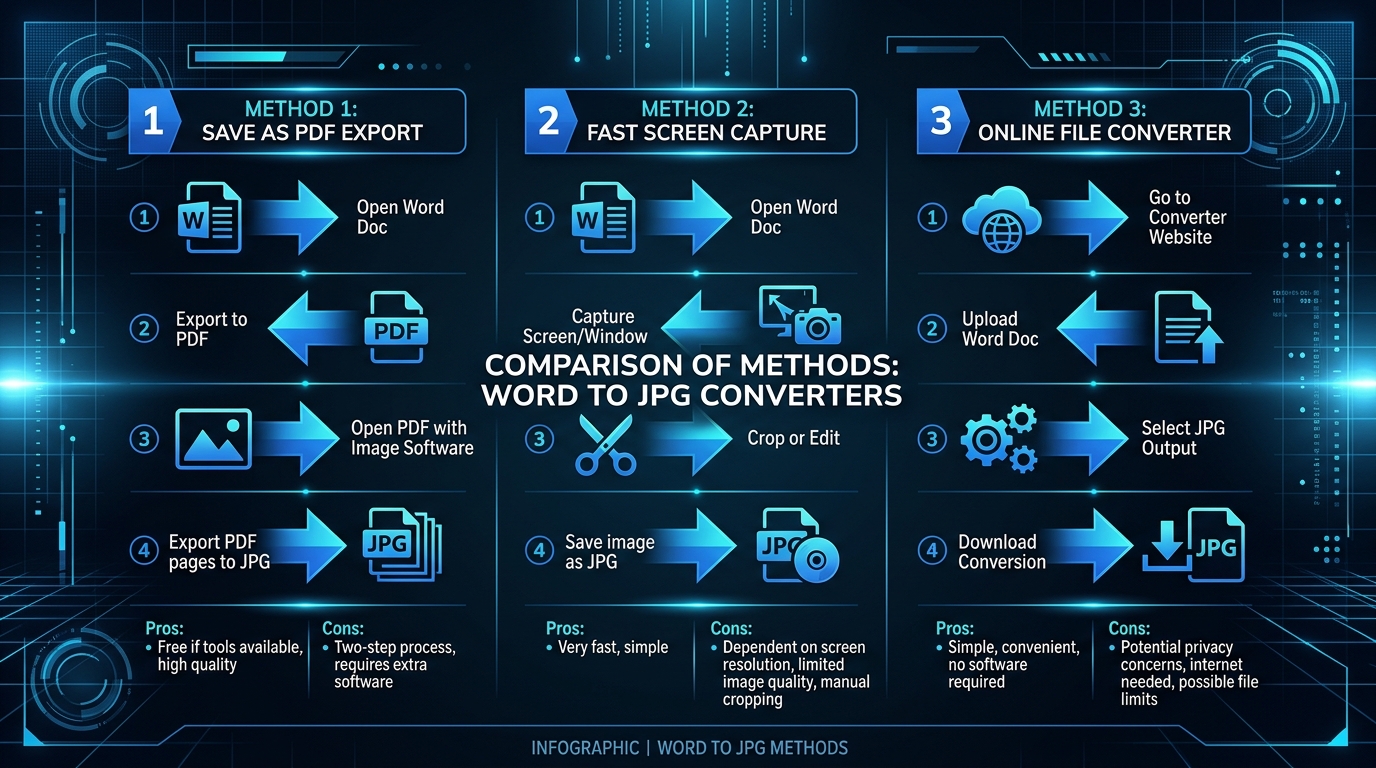
Staring at a Word document, wondering how to turn it into a shareable image? You're definitely not alone. Whether you're posting a flyer online or sending a quick preview to a colleague who doesn't have Word installed, converting to JPG solves a real, common problem. This guide covers the simplest, most practical methods available, along with tips for avoiding common mistakes like cropped margins or blurry text.
What Is the Simplest Way to Turn a Word File Into a JPG?
The quickest route for most people involves exporting your Word document to PDF first, then converting that PDF into an image using any free online tool. This two-step process works reliably across Windows, Mac, and even mobile devices.
Alternatively, a screenshot works fine for a single, simple page. It's less precise than a proper export, but for quick, informal sharing, it gets the job done in seconds without any extra software.
How to Convert a Single Word Page Into an Image
Open your document and use the "Save As" or "Export" menu to create a PDF version first. From there, open the PDF in any viewer that supports image export, and save that single page directly as a JPG file.
This method preserves your original formatting far better than a screenshot, since it uses the document's actual rendering engine rather than capturing whatever happens to be visible on your screen at that moment.
How to Handle a Word Document With Several Pages
Multi-page documents need each page handled separately, since a single JPG image can only represent one flat page at a time. Export the full document to PDF, then extract and convert each page individually.
| Pages in Document | Recommended Approach |
|---|---|
| 1–3 pages | Manual export, one at a time |
| 4–10 pages | Batch conversion tool |
| 10+ pages | Dedicated PDF-to-image software |
Batch tools save enormous time once you're dealing with longer documents.
How to Use Screenshots as a Quick Conversion Method
For a fast, no-frills approach, simply take a screenshot of your document as displayed in Word. This works best when the page fits entirely on your screen without needing to scroll.
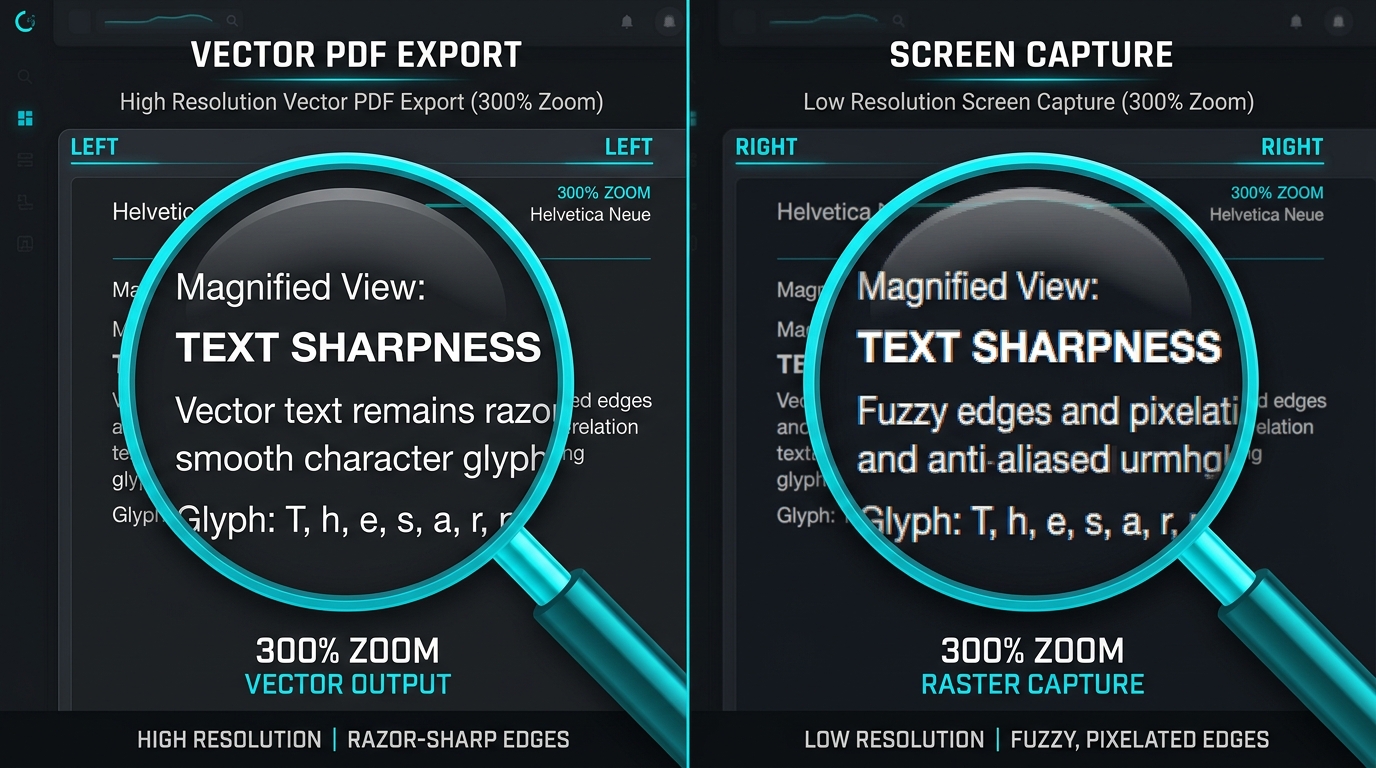
The downside is resolution. Screenshots capture your screen's display quality, which is often lower than what a proper PDF export produces, so text can look noticeably softer around the edges compared to a dedicated export method.
How to Export Word Pages Through Other Document Tools
Google Docs provides a convenient alternative if you don't want to rely on Microsoft Word's own export features. Upload your document, then download it as a PDF before running that file through any basic image converter.
LibreOffice, a free office suite, offers similar export functionality built directly into its interface, letting you skip the PDF intermediate step entirely and export straight to image formats in some versions.
Which Method Gives the Sharpest Text?
Direct PDF-to-JPG conversion at a high DPI setting consistently produces the sharpest results. This method renders text using vector data rather than capturing a fixed-resolution screen image, preserving crisp edges even when zoomed in.
Screenshots, by comparison, are limited by your monitor's resolution and zoom level within Word itself. Increasing your zoom percentage before capturing can help somewhat, but it won't match a proper high-resolution export.
How to Avoid Cropped Margins and Missing Content
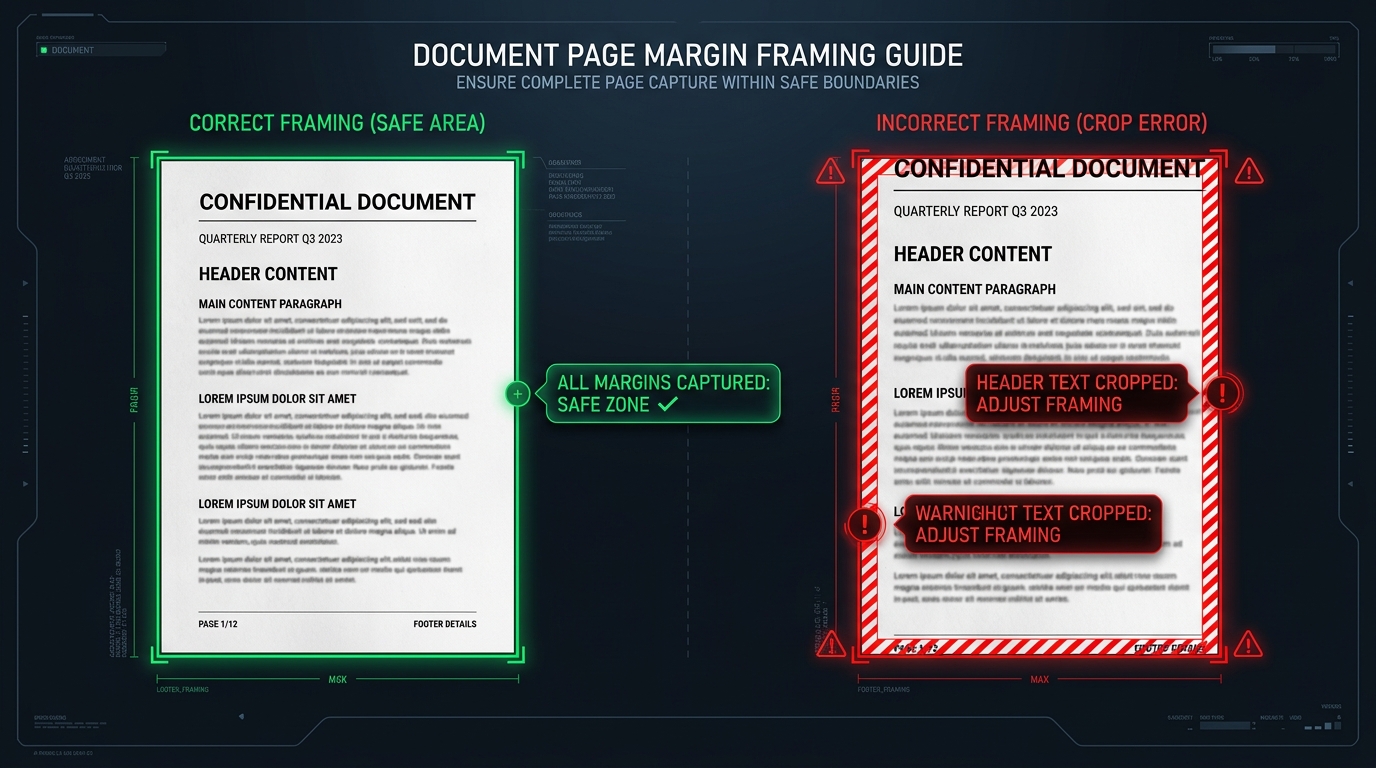
Always preview your export before finalizing it. A common mistake involves page margins or footer content getting cut off, especially when using screenshot-based methods that only capture the visible screen area.
Double-check that your entire page, from top margin to bottom margin, appears within the final image. Adjusting your zoom level or window size in Word beforehand helps ensure nothing important gets accidentally trimmed away.
How to Control the Size of the Final JPG
Most conversion tools let you specify output dimensions or resolution directly. Higher resolution settings produce larger, more detailed files, while lower settings create smaller files better suited for quick web sharing.
For documents you'll print later, aim for at least 300 DPI. For casual sharing through email or messaging apps, something closer to 150 DPI typically balances clarity and reasonable file size quite well.
How to Check the Image Before Sharing or Uploading It
Open the finished JPG and zoom in on the smallest text to confirm it remains readable. Blurry or pixelated text at this stage means you should redo the export at a higher resolution setting.
Also verify that colors, especially in logos or graphics, appear accurate and haven't shifted due to compression. A quick side-by-side comparison with your original document catches most remaining issues before you send anything out.
Conclusion: Finding a Practical Word-to-JPG Method
There's no single "best" way to convert Word to JPG — it depends on your document length, quality needs, and available tools. A PDF-based export generally beats screenshots for sharpness, while batch tools save time on longer files. Whichever method you choose, always preview the result before sharing it.