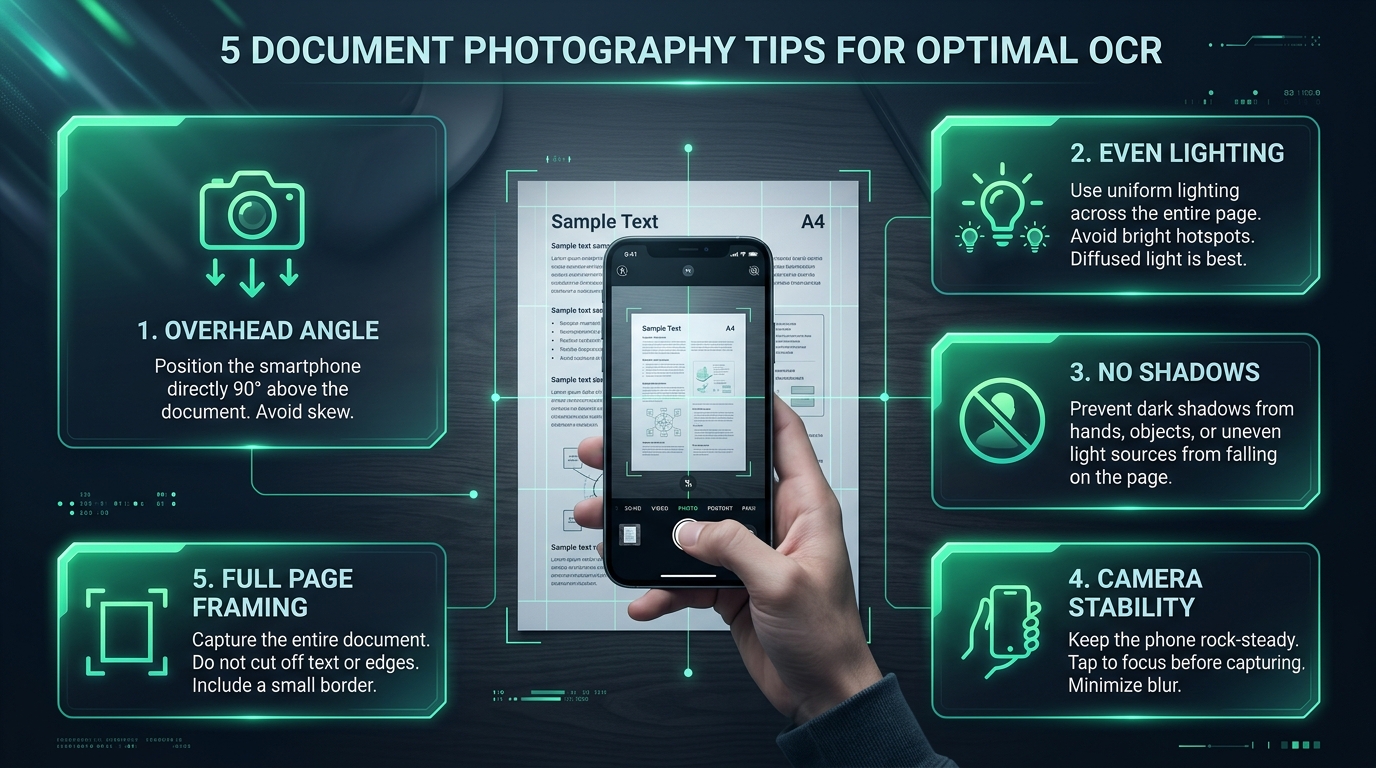
Garbage in, garbage out. That old saying applies perfectly to OCR technology. No matter how advanced the recognition software gets, a poorly taken photo will always produce disappointing results. The good news is that a few simple photography habits dramatically improve your outcomes. This guide covers five practical techniques for capturing document photos that give OCR engines the best possible chance at accurate text extraction.
How to Position the Camera Directly Above the Document
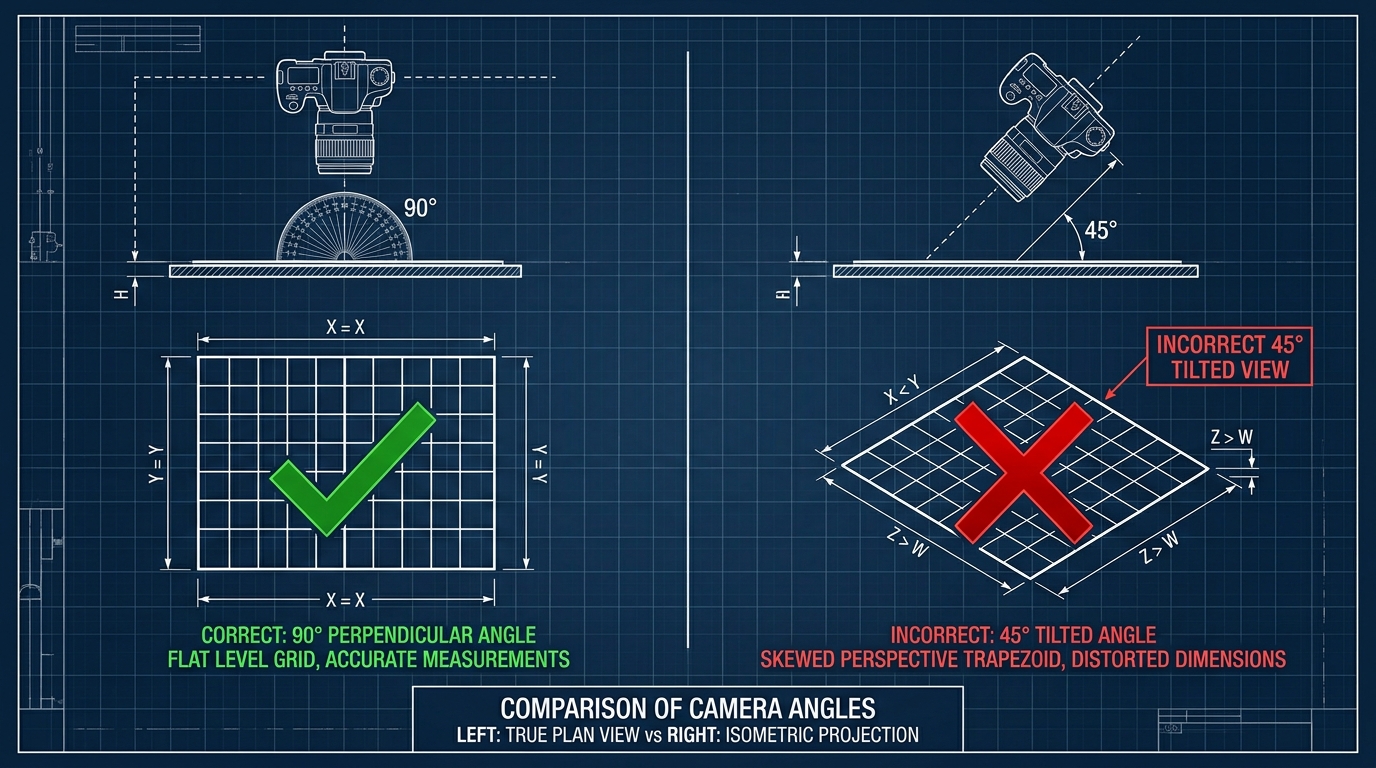
Angling your camera even slightly off-center introduces perspective distortion, making straight lines of text appear subtly curved or slanted. This confuses OCR algorithms that expect text to run in predictable, straight rows.
Position your phone or camera directly overhead, parallel to the document's surface. Many phone cameras now include a built-in leveling guide specifically for this purpose, helping you achieve a perfectly flat, distortion-free angle every time.
Why Good Lighting Matters More Than You Might Expect
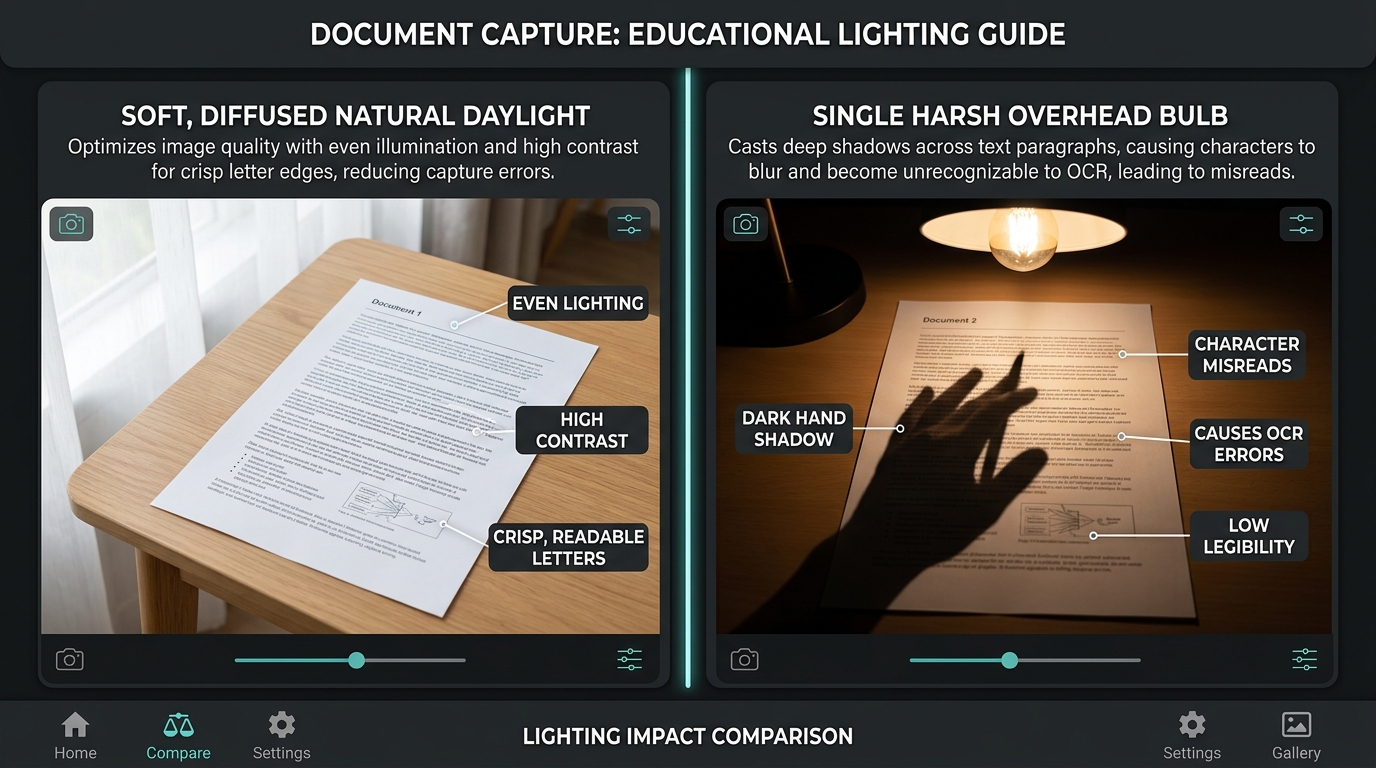
Dim lighting forces your camera to use a slower shutter speed or higher ISO setting, both of which introduce blur or grain that directly undermines OCR accuracy. Bright, even lighting solves this problem at the source.
Natural daylight near a window often provides the best results, offering soft, even illumination without harsh shadows. Avoid direct sunlight, though, since it can create glare on glossy paper or overly harsh contrast.
How to Avoid Shadows Across Important Text
Shadows falling across your document create dark patches that can mimic ink or obscure actual text entirely, both of which throw off character recognition significantly. Even a shadow cast by your own hand while holding the phone causes problems.
Position your light source so it illuminates the entire page evenly, ideally from above rather than from a low angle that would stretch shadows across the text itself.
Why Focus and Camera Stability Affect OCR
A shaky hand introduces motion blur, softening text edges exactly the way described in problems with blurry JPG conversions elsewhere. Even a fraction of a second of movement during capture can meaningfully degrade image sharpness.
| Stability Method | Effectiveness |
|---|---|
| Handheld, braced elbows | Moderate |
| Resting phone on stable surface | Good |
| Using a tripod or stand | Excellent |
Tap your screen to confirm focus lands directly on the text before capturing the shot.
How to Keep the Entire Page Inside the Frame
Cropping off part of your document means losing that content entirely, with no way to recover it later during the conversion process. Always double-check your frame before capturing to ensure every margin and edge appears fully visible.
Leave a small border of background visible around the document's edges rather than framing too tightly. This buffer helps avoid accidentally clipping corner text and gives cropping software room to work with afterward.
What Perspective Distortion Does to Text Recognition
Even slight tilting of your camera angle creates a trapezoid effect, where one side of the document appears larger than the other in your captured image. This distortion warps straight text lines into subtly curved shapes.
OCR software generally handles minor distortion reasonably well through built-in correction algorithms, but severe angles overwhelm these corrections, leading to significantly increased misreads and formatting errors in your final result.
How to Choose Between Natural and Artificial Lighting
Natural window light generally produces the most even, flattering results for document photography, particularly on overcast days when sunlight is diffused rather than harsh and direct.
Artificial lighting works fine too, provided it's bright and evenly distributed. Avoid single, harsh light sources like a bare desk lamp, which tend to create uneven brightness across the page and harsh shadows near the light's direction.
Why Cleaning the Camera Lens Can Improve Document Photos
A smudged lens introduces a subtle haze across your entire photo, softening fine details exactly where you need sharpness most. This is an easy problem to overlook since the haze isn't always obvious until you zoom into the actual image.
Wipe your phone's camera lens with a soft cloth before any important document photography session. This simple, ten-second habit meaningfully improves clarity, especially for smaller text near the edges of the frame.
How to Check Your Photo Before Sending It to an OCR Tool
Zoom into several different areas of your captured photo, checking corners as well as the center, before committing to that shot as your final version. Corners often suffer more distortion and softness than the middle of the frame.
If anything looks blurry, shadowed, or distorted upon closer inspection, retake the photo rather than proceeding. A few extra seconds spent reviewing saves considerably more time than troubleshooting a poor OCR result later.
Conclusion: Taking Better Document Photos for More Accurate OCR
Getting OCR to work well starts long before you open any conversion tool. Position your camera directly overhead, ensure even lighting, hold steady, and frame your entire document within the shot. These small habits, practiced consistently, dramatically improve text recognition accuracy across virtually every OCR platform you might use.